How to setup Sign in with Apple with WorkOS or Auth0
Learn how to set up Sign in with Apple with WorkOS or Auth0, step by step. Plus, stay tuned for a guide on scaling with Hummingbird 2! 🚀


When implementing Sign in with Apple, I quickly realized that Apple’s official documentation was confusing and lacked clarity. Since I am standardizing my user registration flow, I needed a seamless way to integrate Apple’s authentication system. However, I found that many guides were either incomplete or assumed prior knowledge of Apple’s Developer ecosystem.
To help others avoid the same frustration, I’ve put together this step-by-step guide that walks you through everything you need to set up Sign in with Apple—whether you’re using WorkOS or Auth0.
Why This Guide?
While trying to integrate Sign in with Apple using Auth0, I encountered a major problem: Auth0’s official documentation was vague and difficult to follow. Key steps were missing or buried in unrelated sections, making it hard to complete the setup.
Take a look at this screenshot from Auth0’s documentation, which illustrates the issue:
As you can see, the guide lacks clear explanations and assumes the user already knows how to retrieve and configure Apple’s required credentials. Because of this, I had to piece together information from multiple sources to make it work.
What You’ll Learn
In this guide, I’ll cover:
- How to retrieve the necessary credentials from your Apple Developer account.
- How to properly configure Sign in with Apple in both WorkOS and Auth0.
- An optional setup for Apple’s Private Email Relay, ensuring users can receive emails even if they choose to hide their real email address.
Prerequisites
Before getting started, make sure you have:
- An active Apple Developer account.
- Either a WorkOS or Auth0 account (depending on your authentication provider).
Now, let’s dive into the setup process! 🚀
Step 1: Retrieve Apple Credentials and Configure Sign in with Apple
To integrate Sign in with Apple, you’ll need to retrieve several credentials from your Apple Developer account and configure them correctly. This section will guide you through the process step by step.
1.1 Retrieve the Apple Team ID
- Sign in to the Apple Developer Portal.
- Navigate to Certificates, Identifiers & Profiles.
- On the landing page, locate your Team ID under your name or company name.
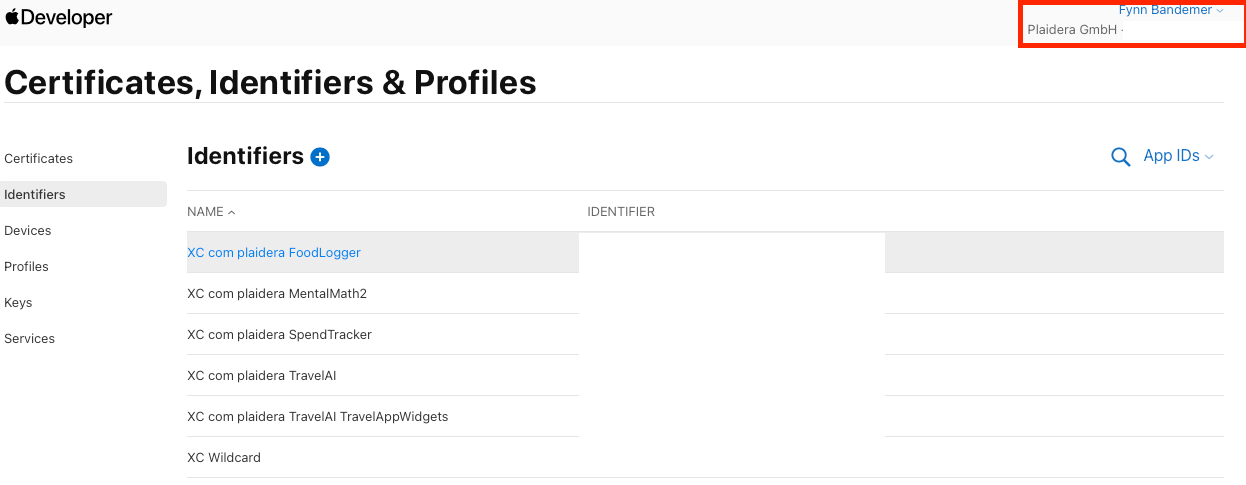
🔹 Important: The Team ID is sensitive and should only be used by the server for authentication. It should never be exposed to the client.
1.2 Register an App ID
📌 Skip this step if you already have an App ID.
- In the Certificates, Identifiers & Profiles section, click Identifiers in the sidebar.
- Click the + button to create a new identifier.
- Select App IDs → Click Continue.
- Select App → Click Continue.
- Enter the following details:
- Description: A human-readable name for your app (e.g., “MyApp”).
- Bundle ID: This should be in reverse domain notation (e.g., com.example.myapp).
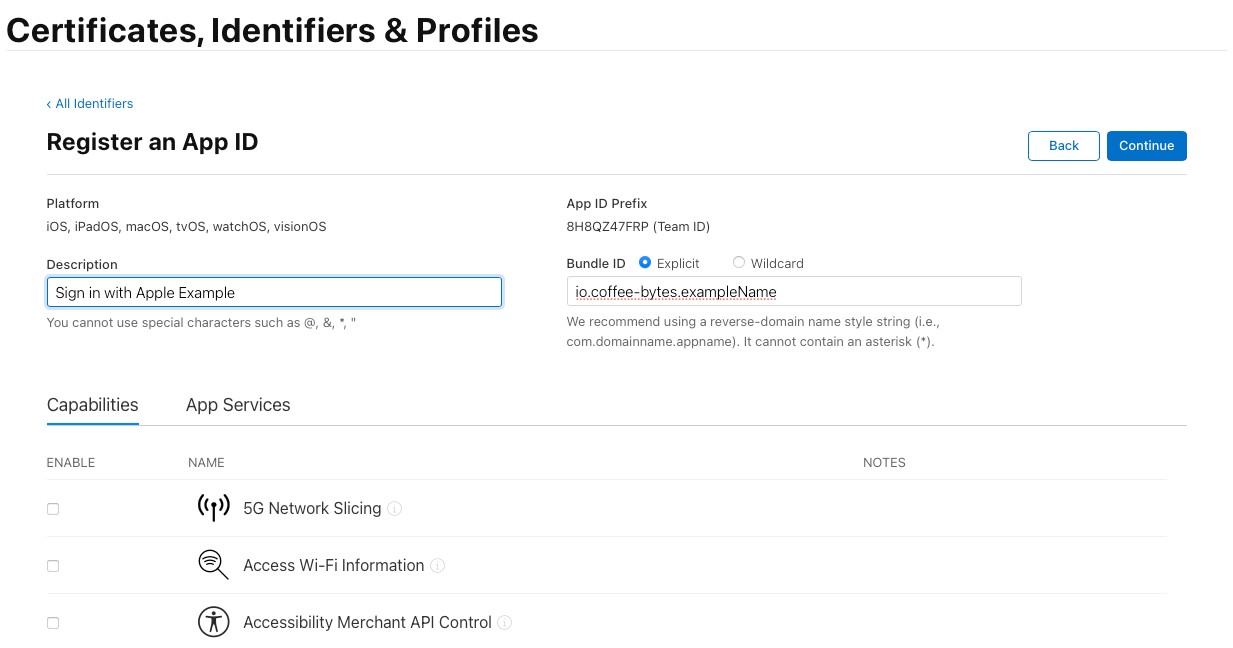
- Enable the Sign in with Apple capability.
- Click Continue, review your selections, and click Register.
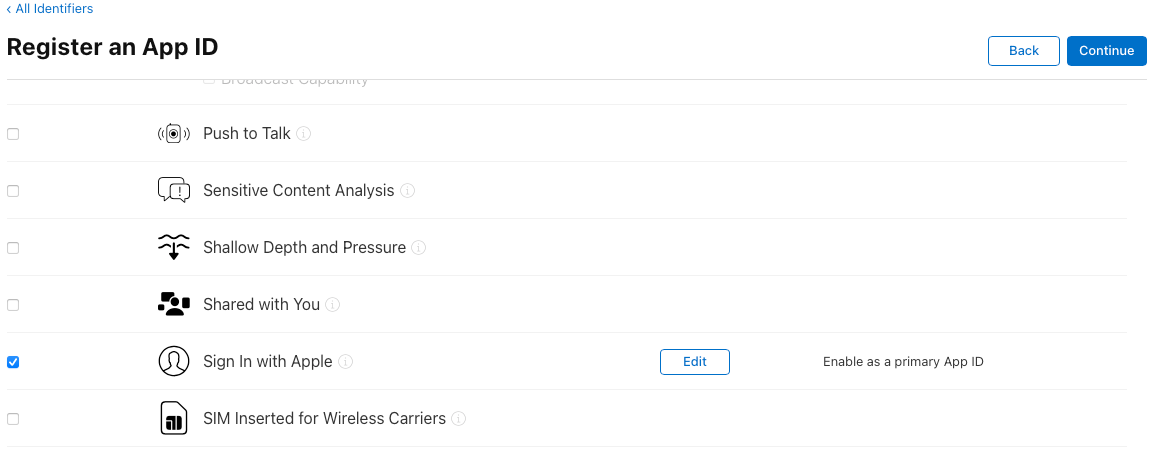
🔹 Why is this needed? The App ID allows Apple to recognize your app and link it to Sign in with Apple.
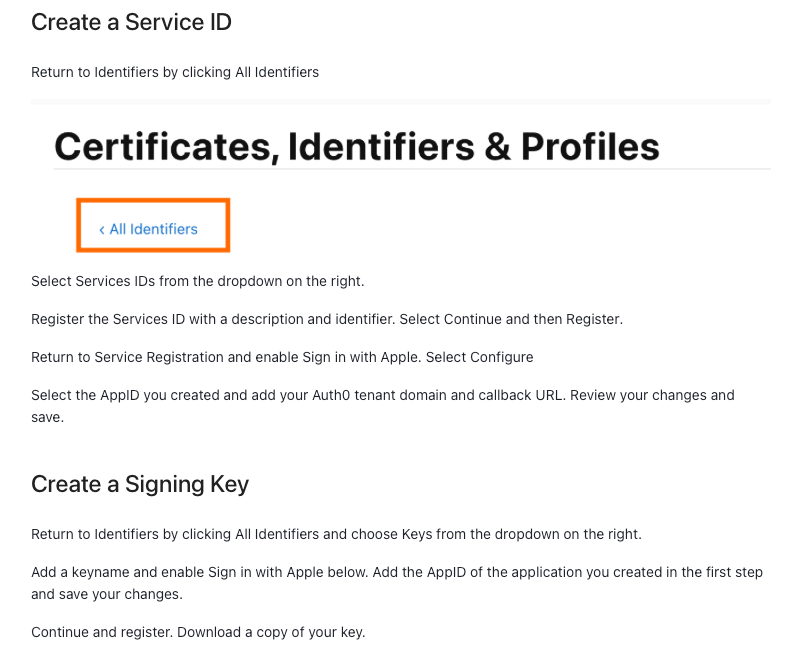
1.3 Register a Service ID
Next, we need to create a Service ID, which is required for web-based authentication.
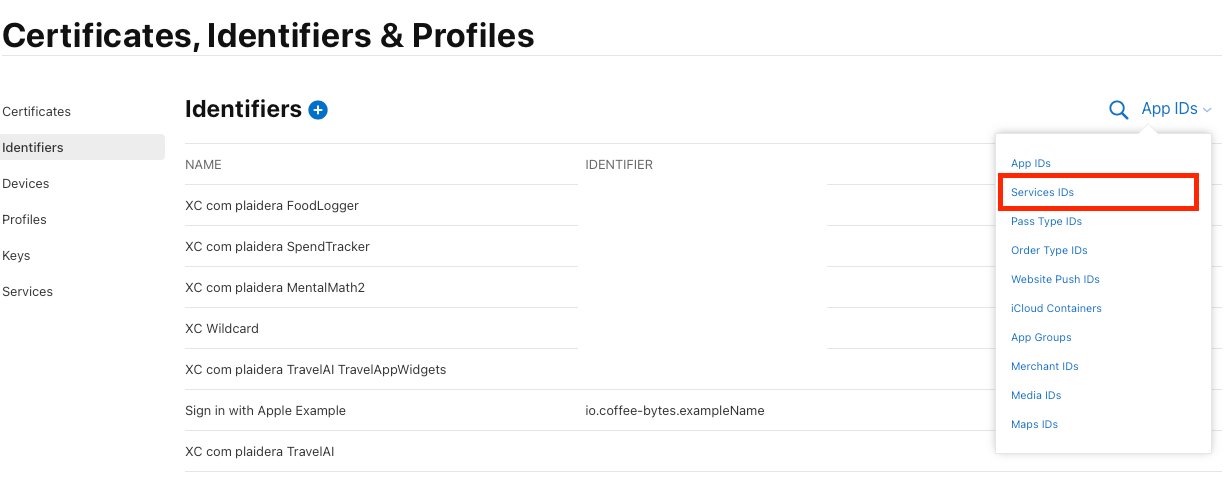
- In the Certificates, Identifiers & Profiles section, click Identifiers.
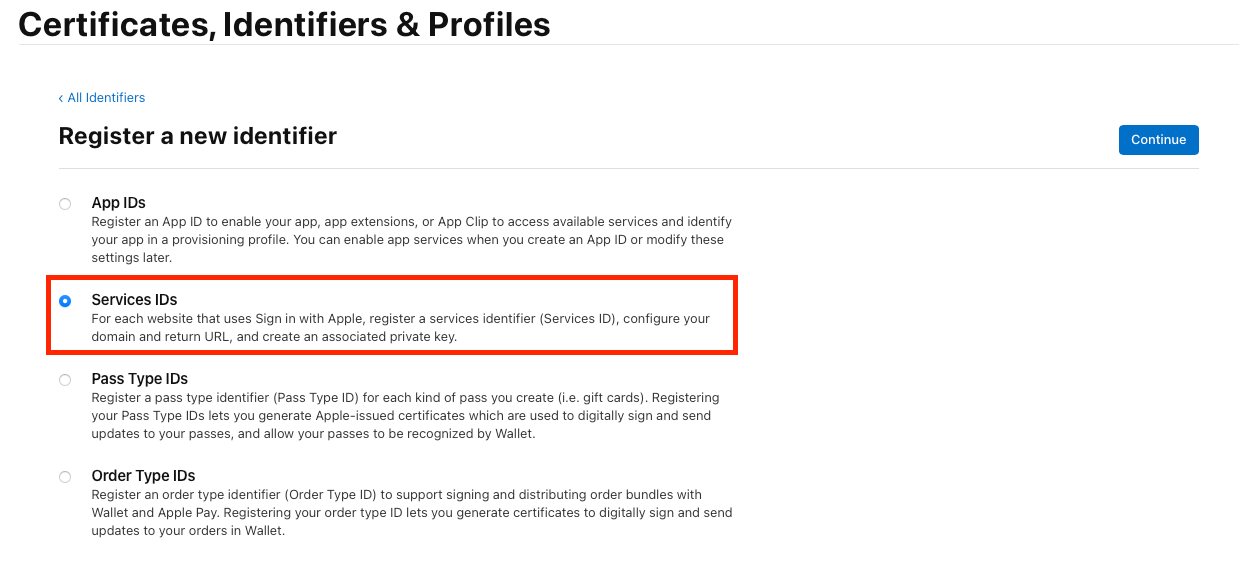
- Click the + button to create a new identifier.
- Select Service IDs → Click Continue.
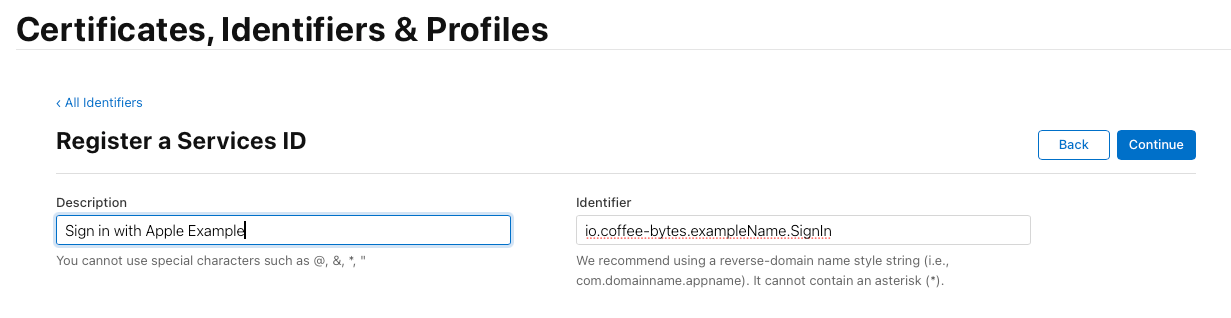
- Enter the following details:
- Description: A human-readable name for your service (e.g., “MyApp Service ID”).
- Service ID: A unique identifier (e.g., com.example.myapp).
- Click Continue → Note down the Service ID for later → Click Register.
- Select the newly created Service ID and click Edit.
- Enable the Sign in with Apple capability.
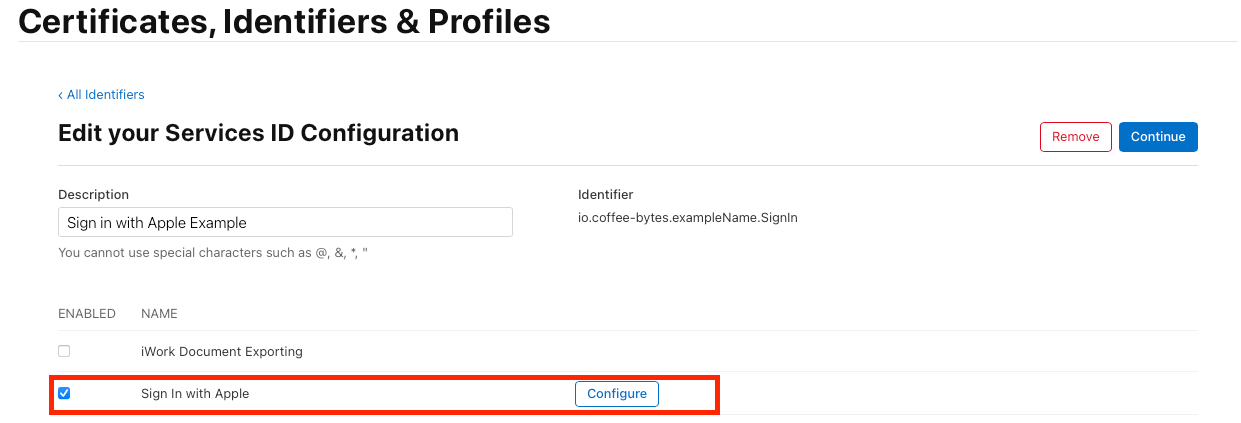
- Click Configure and complete the following:
- Select the App ID you created earlier.
- Enter api.workos.com or auth0.com in the Domains and Subdomains field.
- Paste the Return URI from WorkOS/Auth0 in the Return URLs field.
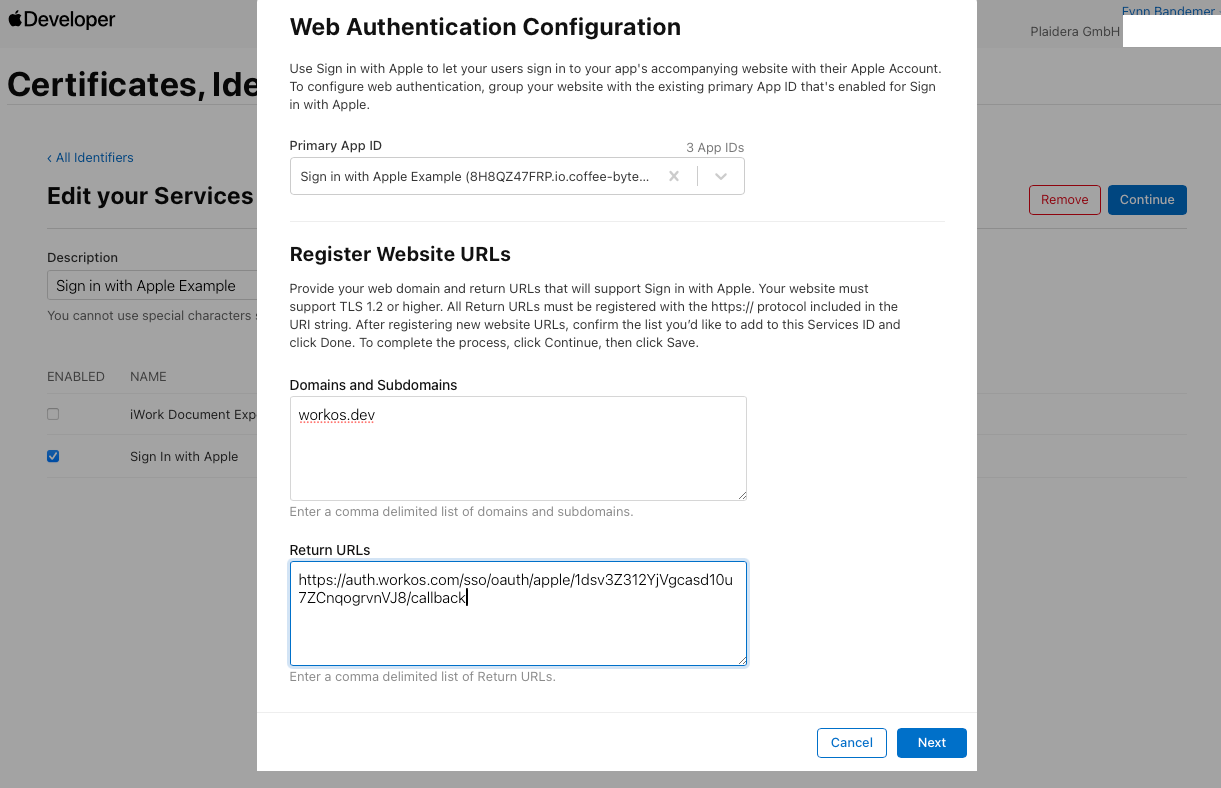
9. Click Next → Done → Continue → Save.
🔹 Why is this needed? The Service ID enables web-based authentication with Apple and links your app to the Apple authentication system.
1.4 Register a Private Key
A Private Key is required to securely authenticate your server with Apple.
- In the Certificates, Identifiers & Profiles section, click Keys.
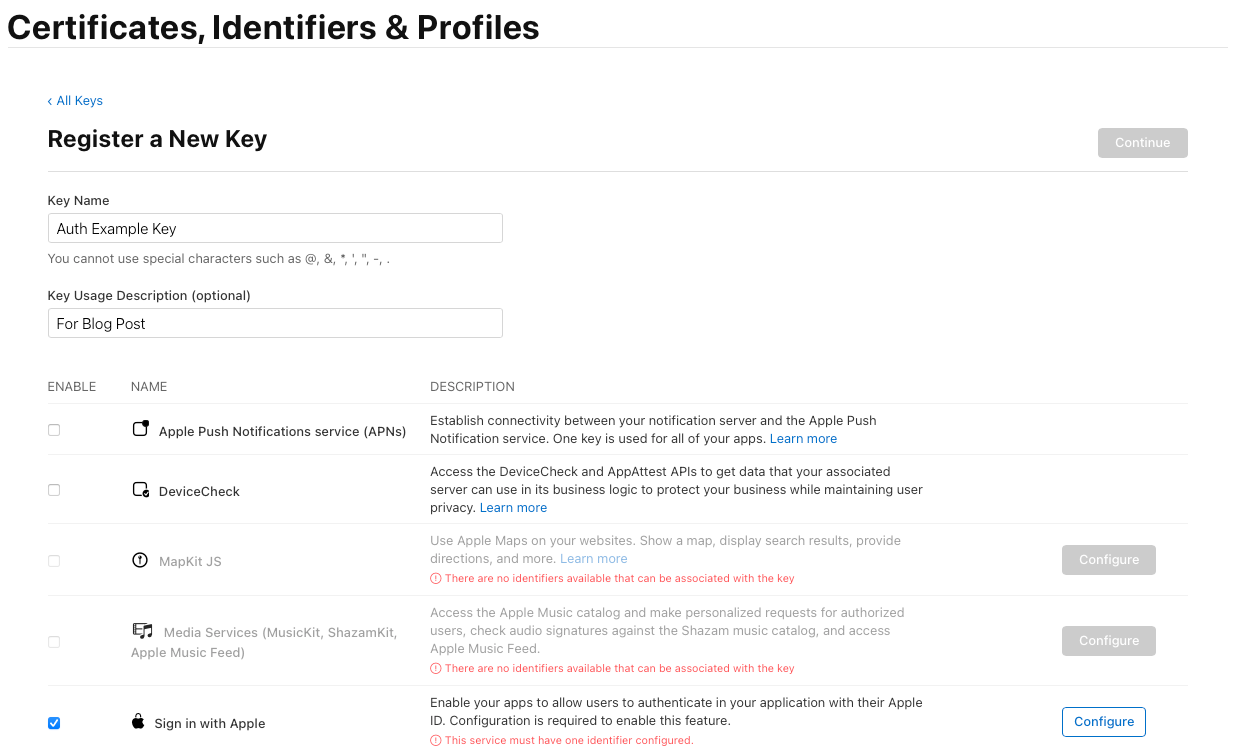
- Click the + button to create a new key.
- Enter a Key Name (e.g., “Sign in with Apple Key”).
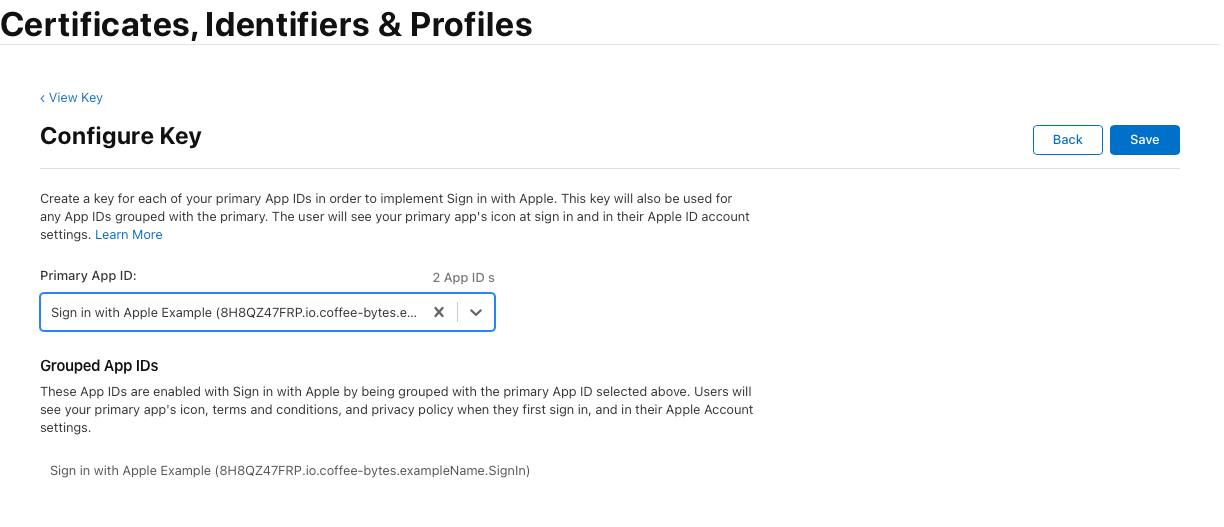
- Enable the Sign in with Apple capability → Click Configure.
- Select the previously created App ID and click Save.
- Click Continue → Review the details → Click Register.
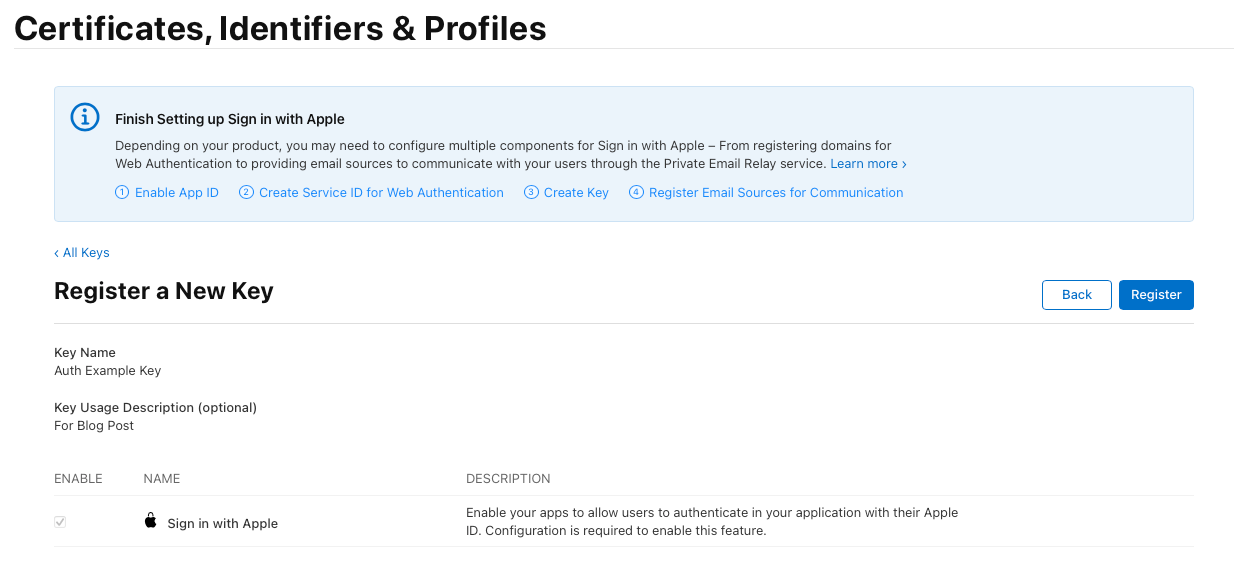
- Download the private key (you won’t be able to download it again).
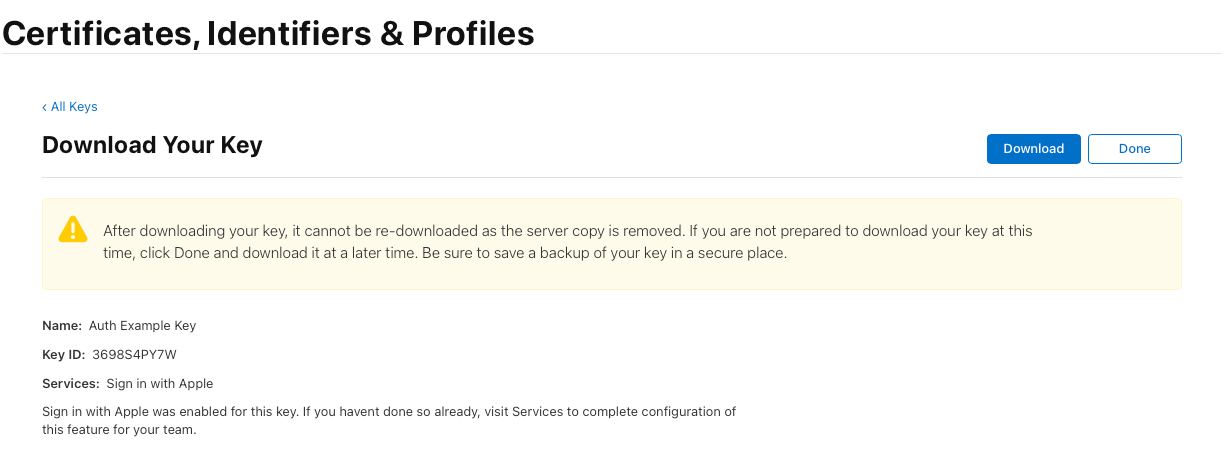
- Note down the Key ID for later use.
🔹 Important: The private key file (.p8) is only available for download once. Store it securely!
1.5 (Optional) Set Up Private Email Relay
Apple allows users to hide their email address, which means they will receive an anonymous @privaterelay.appleid.com email. To ensure they still receive important emails from your app, you need to set up Private Email Relay.
- Navigate to Sign in with Apple settings in WorkOS/Auth0 → Copy the Outbound Email Domains.
- In your Apple Developer Account, go to Services → Click Sign in with Apple for Email Communication → Click Configure.
- Click the + button → Paste the Outbound Email Domains from WorkOS/Auth0 into the Domains and Subdomains field.
- Click Next → Click Register.
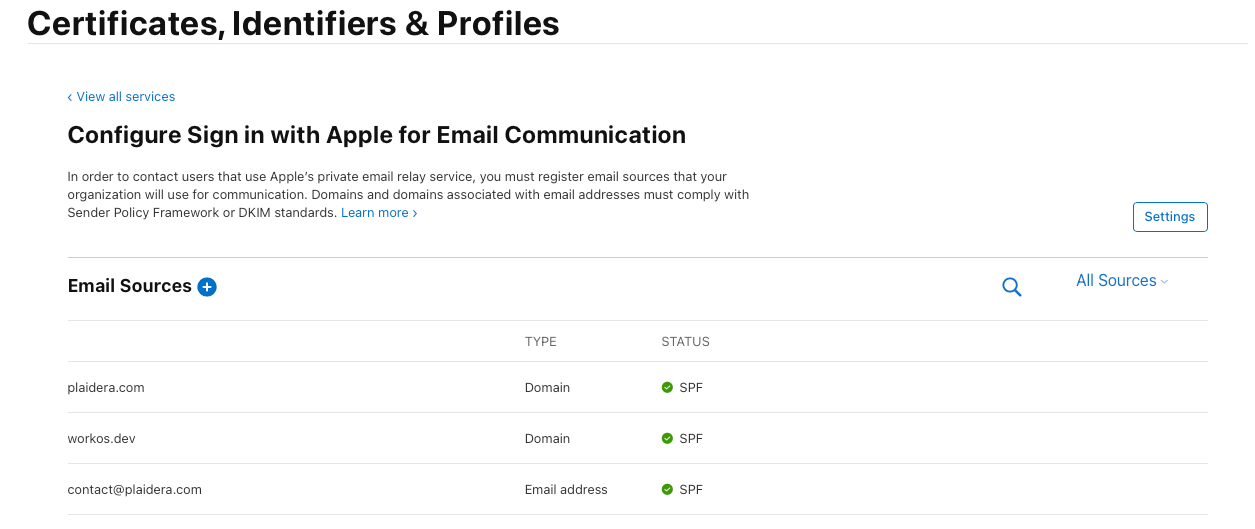
🔹 Why is this needed? This step ensures email forwarding works correctly for users who choose to hide their email address.
Step 2: Configure Sign in with Apple in WorkOS and Auth0
Now that you’ve retrieved the necessary Apple credentials, the next step is to integrate Sign in with Apple into either WorkOS or Auth0. This section provides a step-by-step guide to configuring each platform correctly.
2.1 Configure Sign in with Apple in WorkOS
- Log in to the WorkOS Dashboard
- Navigate to WorkOS Dashboard.
- Click on Authentication in the sidebar.
- Locate Sign in with Apple and click Edit.
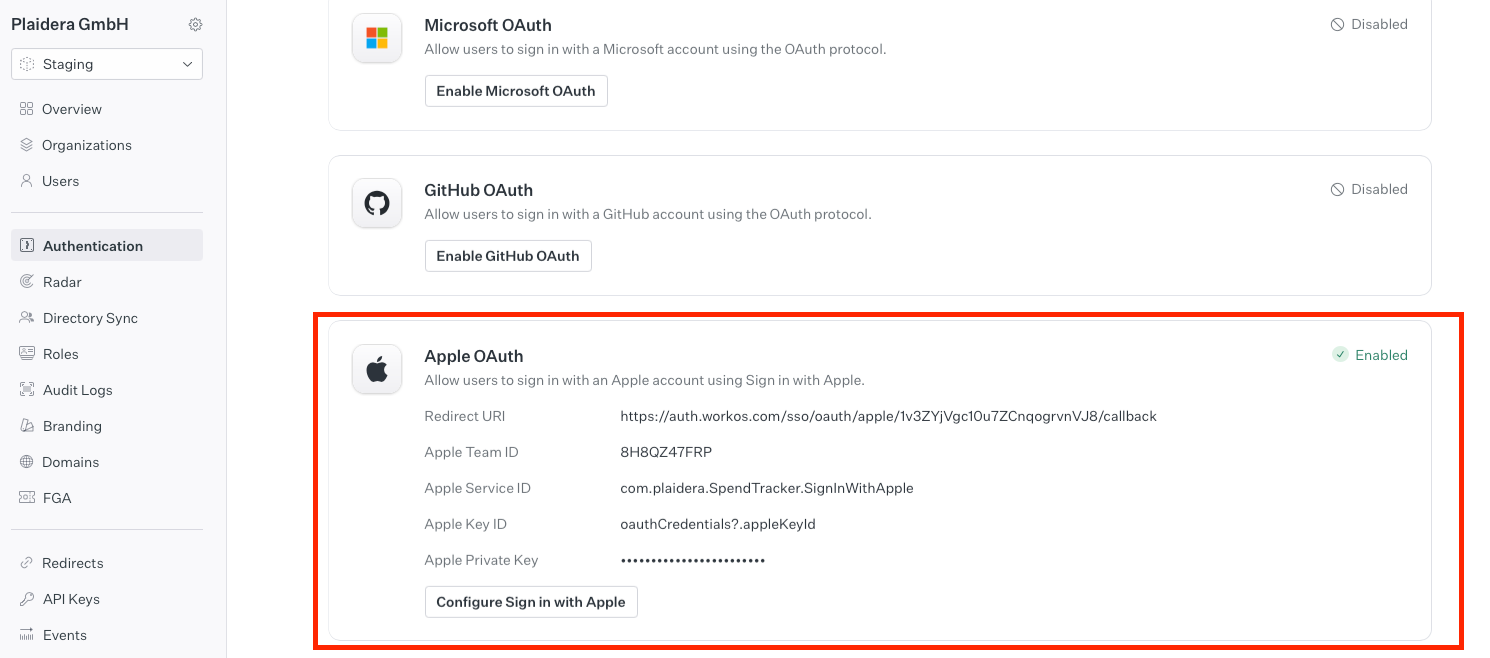
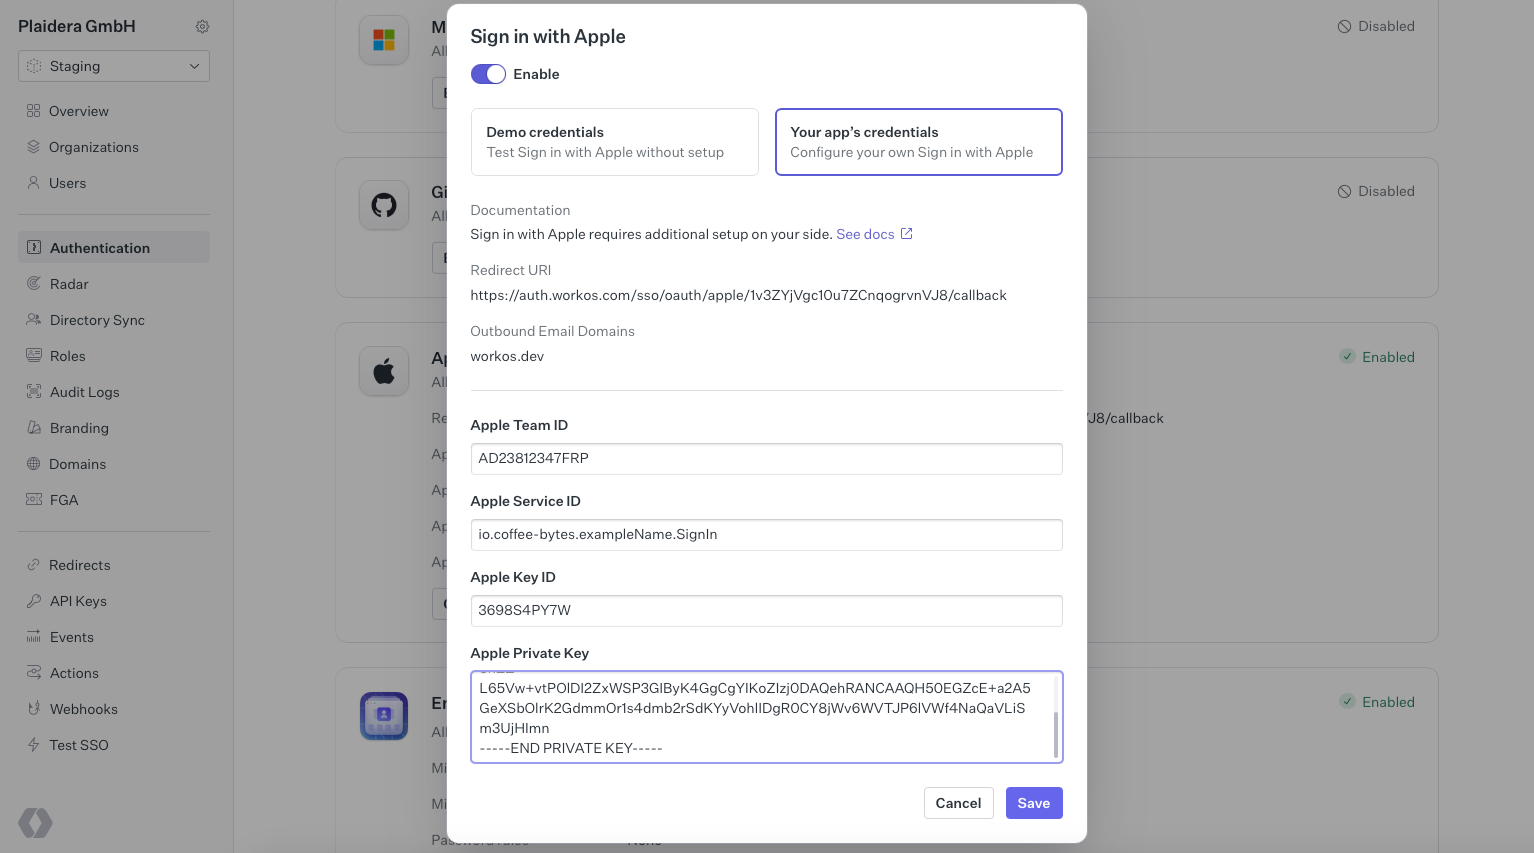
- Enable Sign in with Apple
- Toggle Enabled.
- Enter the credentials retrieved from Apple:
- Team ID
- Service ID
- Private Key ID
- Private Key Contents (copy & paste the .p8 private key file contents).
- Test the Integration
- Try signing in with an Apple account in your application.
- Check the WorkOS logs to confirm the authentication flow works correctly.
🔹 Common Issues & Fixes:
- Invalid private key error? Ensure the .p8 key is correctly copied and has no extra spaces.
- Mismatched Return URI? Double-check that the Apple Developer settings match WorkOS.
2.2 Configure Sign in with Apple in Auth0
- Log in to the Auth0 Dashboard
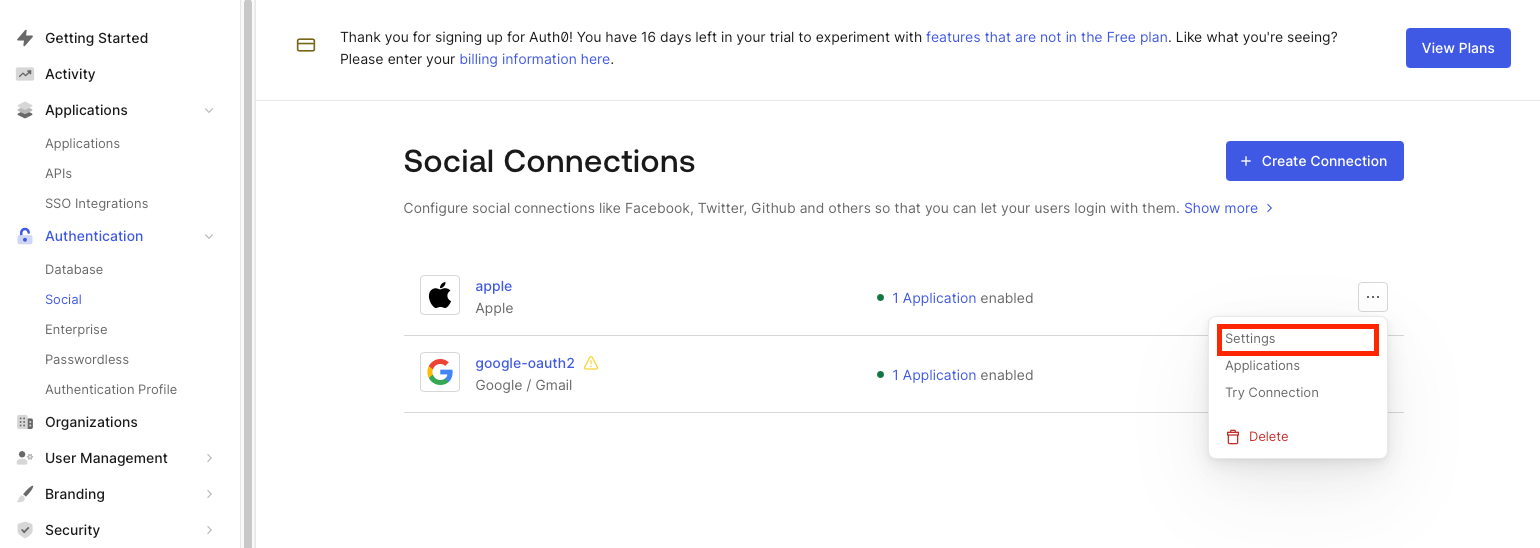
- Navigate to Auth0 Dashboard.
- Click on Connections → Social.
- Locate Sign in with Apple and click Settings.
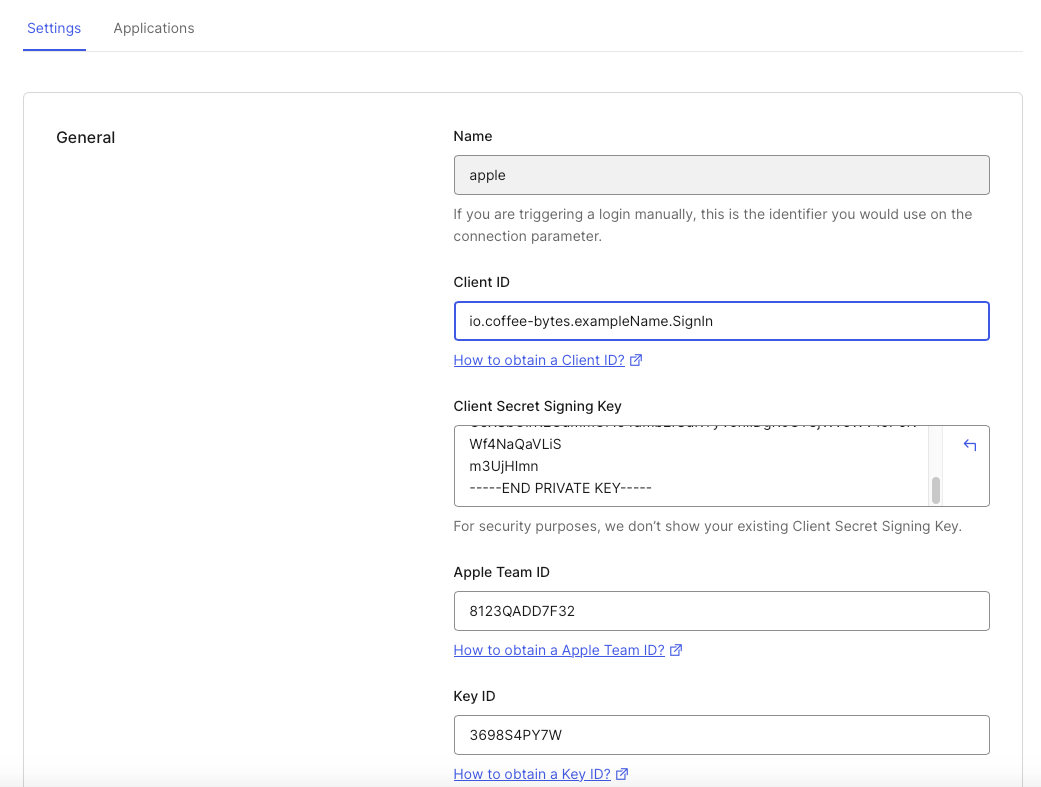
- Enter Apple Credentials#
- Client ID (Service ID from Apple Developer)
- Team ID
- Key ID
- Private Key (copy & paste the .p8 key contents)
3. Set Authorization & Token URLs
• In Advanced Settings, enter the following values:
• Authorization URL:

🔹 Common Issues & Fixes:
- Error: Invalid client ID? Ensure the Service ID in Apple Developer matches the Client ID in Auth0.
- Token error? Ensure the Authorization and Token URLs are correctly set.
Now that you’ve successfully configured Sign in with Apple in either WorkOS or Auth0, your users can authenticate using their Apple accounts.
📌 Final Checklist Before Deployment:
✅ Ensure Return URIs match between Apple Developer and your auth provider.
✅ Verify that Sign in with Apple is enabled in WorkOS/Auth0.
✅ Test the authentication flow with a real Apple account.
With this setup, your app is now ready to support Apple’s authentication system smoothly! 🚀
Conclusion
Setting up Sign in with Apple can be challenging, especially with the lack of clear documentation from Apple and third-party providers. In this guide, I walked through the exact steps needed to retrieve credentials from Apple, configure authentication in WorkOS and Auth0, and ensure everything is properly linked.
By following these steps, you should now have a fully functional Sign in with Apple integration, allowing users to seamlessly log in with their Apple ID. If you encounter issues, double-check your return URIs, private keys, and service configurations—these are common pain points.
What’s Next?
To further scale user management, I’ll be writing a follow-up blog post on how to set up a proxy server with Hummingbird 2. This will allow better authentication handling and load balancing, making it easier to manage authentication flows at scale. Stay tuned! 🚀


Discussion